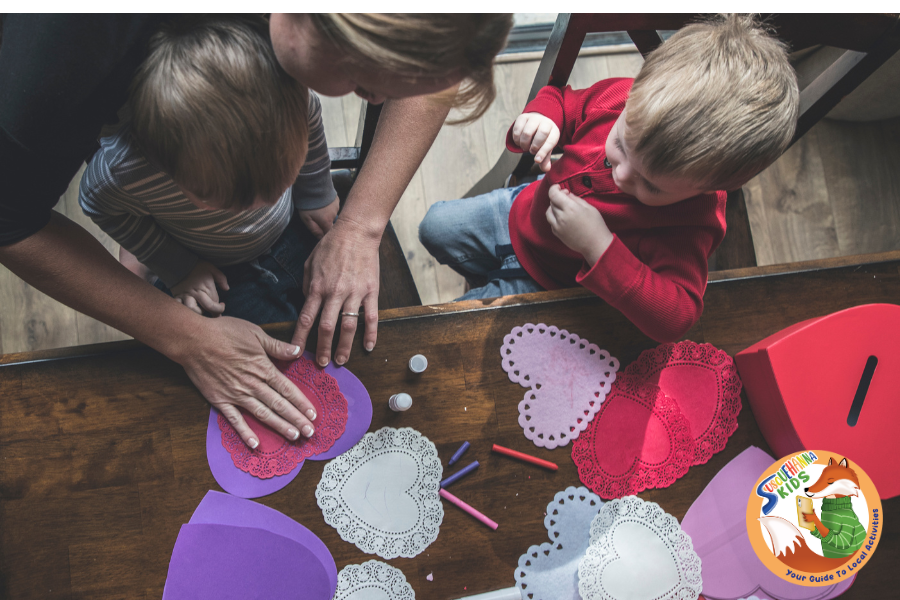
With cold and stormy weather outside,Valentine’s Day begs for indoor crafting fun. We sat down with a few of our favorite arts & crafts studios in our 5 counties to put together a vivid list of Valentine’s Day ideas! These projects are all fairly simple, and most likely only require things we would have in our own homes or can easily acquire. Most of these items can be purchased at places like Walmart, Michael’s, or Dollar Tree, and you can get creative with the materials you have at home!
STEAM Innovation Labs (Sunbury): Hand Painted Trinket Tray
Supply List:
💘Air Dry Clay
💘Water Color Paint / Acrylic Paint
💘Paint Brush
💘Card Stock / Paper
💘Scissors
💘Pencil
💘X-Acto Knife / Plastic Cutting Tool
💘Mason Jar or Glass
💘Silicone Mat / Ceramic Tile / Parchment Paper
💘Small BowlCardstock (regular paper can be used but will wrinkle)


Instructions:
1. Fold your card stock in half and draw a heart. Cut along the lines to create a template for your tray.
2. Grab a handful of air dry clay and flatten it on your work surface. Take your mason jar or glass and roll it out evenly.
3. Gently place your heart template on the clay and carefully cut around without pressing the paper into the clay.
4. Round the edges and smooth out the surface with your fingers. Here you can draw, write, stamp, or press images into your clay if you choose. Press lightly just to make an indent.
5. Place your trinket dish in a small bowl to have a curved shape. Paint your clay while its still wet with water colors, or wait till its dry to paint with acrylic paint.
6. Allow the dish to dry fully over the next few hours. You can paint the surface and the edges as you please. Flip the try out of the bowl in about an hour to allow the clay to dry evenly.


Learn More!

STEAM Innovation Labs is built upon community and creativity. We support hobbyists, entrepreneurs, and artists at every skill level. STEAM is a safe space to learn, collaborate, and have fun. We are open to anyone who wants to understand how things work and get involved in the making process.
Jot & Tittle Studios (Bloomsburg): Enamel Painted Heart Dish
Paint a tiny porcelain heart dish using special acrylic enamel paint,then it’s bake it to cure the design. It’s a sweet little keepsake for holding rings, coins, or tiny treasures! Don’t have this exact dish? No worries…any oven-safe porcelain, ceramic, or glass works!
This is not regular acrylic paint, it is an enamel that’s meant to be baked to cure to a dishwasher-safe finish. We prefer Folk Art Multi-Surface or Folk Art Enamel.
Supply List:
💘Oven-safe porcelin, ceramic, or glass dish (heart shaped, or any other shape you like)
💘Enamel paint in any color(s)- red, pink, purple, white…
💘Paint brush(es)
💘Paper towels or rags (for wiping paint)
💘Oven to cure dish (*adult supervision required)
Instructions:
1. Wipe it clean: Make sure the dish is dry and free of dust or oils. An alcohol or lens wipe works great.
2. Paint your design: Hearts, polka dots, flowers, stripes…anything goes! Important tip! Don’t rinse the brush between colors because water can degrade the paint. Just wipe the brush clean on a paper towel before switching colors.
3. Let it dry completely, then bake to cure (adult supervision required): Follow your specific paint bottle’s baking directions for time/temp and safe handling, which usually includes placing in a cold oven, then heating to 350 degrees for 30 mins, and allowing to cool completely in the oven. Once cool, it is dishwasher safe!


Learn More!

🎨 Craft and Paint Workshops
👚 Custom Gifts, Apparel, Decor and More
🍫 Creative Marketing Promos and Packaging
🖌️ DIY Craft Kits and Canvases
Janine Hall: Local Mom and Crafter Extraordinaire
Valentine’s XOXO Flower Wrapping

Flowers always brighten one’s day so I thought a small bouquet would be cute for a teacher gift or for someone else special. To make it even sweeter I had the kids paint XOXO’s on a recycled paper grocery bag. I love to mix and match small batches of flowers from the grocery store. Remember this doesn’t need to be a big bouquet just sweet and simple.
Supply List:
💘Brown paper grocery bag
💘Black paint
💘Paintbrush
💘Tape
💘Flowers (pink, red, purple, white)
💘Ribbon, tissue paper, & optional tag
Instructions:
1. Cut a 12 x 12″ piece out of brown bag.
2. Paint xoxox until sheet is full. Let dry.
3. Add a few stems together. (I like to add a damp paper towel around stem ends and then tie a plastic baggie around that to keep flowers alive).
4. Place on tissue paper and brown paper and wrap them up! Tape to secure paper.
5. Ribbon and tag optional. (I love ribbon from Michael’s and there are so many print at home tags on Etsy.)
Paper Heart Chains

We love how this turned out. A fun, cute, and simple activity to make with kiddos! Heart Paper Chains make the cutest Valentine decor.
Supply List:
💘Red, White, Pink, or other colored cardstock (construction paper works too, just a bit more flimsy)
💘Stapler
Instructions:
1. Cut paper into strips approximately 1 1/2″ width and 8″ long
2. Staple two pieces together at the top, make heart, and staple at the bottom.
3. Continue the process, attaching each new heart to the bottom of the previous one, to reach desired length of chain.
4. Display anywhere you like in your home of children’s room.
Thumbprint Heart Cookies
Baking with my kids is one of my favorite things to do, especially on cold winter days. These little thumbprint heart cookies are easy to make and the perfect treat with some hot cocoa. Eat them all up or make a batch, box up, add some Valentine ribbon, and gift to family and friends.

Conversation Heart Magnets
These are adorable to add to your refrigerator, make for classmates, give as a little gift! Supplies can be found at Michaels or Walmart. Stamp set (like this) on Amazon.


Supply List:
💘Air dry clay
💘Small heart-shaped cookie cutter
💘Magnets (small enough to fit on the back of the heart shape)
💘Acrylic paints in various colors
💘Paintbrush
💘Stamps (optional)
💘Hot glue gun
Instructions:
1. Roll out air dry clay; not too thick, not too thin, but heavy enough to hold a picture or paper in place (about 1/4 inch).
2. Use cookie cutter to make heart shape.
3. Stamp (if using) or leave plain/blank.
4. Paint both sides of heart. We chose colors to match conversation hearts candies.
*Tip: to get a more pastel color, add white to whatever color you’re using until you get your desired shade.
5. Let them dry, it wont take long!
6. Attach a magnet on the back using a hot glue gun.
Learn More!
Be sure to follow Janine on Instagram @janinevhall for all sorts of fun, family-friendly content!
The Creative Space (Selinsgrove): “Love” Hanger
Here is a Valentine’s Day craft that you can make with craft supplies you might already have at home! I also added a few cute accessories that I found at Hobby Lobby.
Supply List:
💘6″ popsicle sticks
💘Paint (using gold here, but choose any color you like)
💘Paintbrush
💘Cardboard
💘Yarn
💘Scissors
💘Hot glue
💘Wooden “Love” cutout
💘Stickers or other decorations
Instructions:
1. Glue 8 popsicle sticks together. Using hot glue, run a bead between each stick. Glue one stick to cover each side of the exposed ends. (This creates a more solid structure as well as making it look nice!)
2. Paint! (I used a soft gold).
3. Use a piece of cardboard to make a heart. Start by cutting a piece of cardboard to fit inside the sign and then draw and cut out the heart.
4. Choose two colors of yarn and wrap around the heart till its entirely covered. If this is difficult because the yarn slips, you can attach a few of the first wraps with hot glue so the yarn has something to hang onto as you keep wrapping. (If your piece of cardboard is too bendy, you can glue a small popsicle stick to the back to give it structure).
5. Put it all together. Attach a piece of twine to the back top corners with hot glue to make the hanger. Then glue the word and yarn heart to the front. (I used a big dollop of glue to get the heart well attached!)


Learn More

Sewing/Crafting/Pottery studio where you can take classes, host workshops, or celebrate with parties.
Bluebird Atelier (Lewisburg)
Name Bracelets


Supply List:
💘Alphabet beads
💘Pipe cleaners
Instructions:
1. String beads on pipe cleaner to spell recipient’s name.
2. Finish by twisting ends of pipe cleaner together.
Silly Heart People
After running out of “A” beads for the name bracelets, my daughter got creative with finished coloring pages to make silly heart people. I cut a heart stencil out for her (recycled junk mail for the win!) She used this stencil to make hearts out of the coloring pages, and wrote the recipient’s name on the back. Then, she added arms and legs by attaching pipe cleaner pieces (cut by me) with clear tape. Finally, she added googly eyes, and other details like pipe cleaner smiles, with liquid glue. We had a blast crafting all morning in our pajamas. The best part was how she thought about her friends’ favorite colors, and their personalities. For example, her silly friends would get heart people with giant mustaches!


Supply List:
💘Craft paper (or recycled coloring pages)
💘Scissors
💘Pipe cleaners
💘Googly eyes
💘Clear tape
💘Liquid glue,
💘Markers (to write recipient’s name)


Instructions:
1. Cut heart shapes out of paper in whatever size you want your Valentines to be.
2. Write the recipient’s name or a message on the back.
3. Cut a pipe cleaner into four sections (two shorter and two longer) for arms and legs.
4. Tape on with clear tape. Glue or stick on googly eyes, pipe cleaner smiles, or any other details you
want (ideas include glitter, tiny pom-poms, stickers, and yarn “hair.”)
5. Lay flat and allow glue to dry overnight.
Learn More
Bluebird Atelier is a creative learning studio offering art classes for all ages, preschool, afterschool enrichment, summer camp, and birthday parties for children. At Bluebird Atelier Preschool, our teachers are trained to listen intently to children. We take their ideas and help bring them to life. By following the children’s interests and encouraging their authentic creativity, our students are empowered to exercise independent thinking. They gain more valuable skills from this messy process than from cookie-cutter or commercially produced activities. And, let’s face it, kiddos have the best ideas!
